Support our educational content for free when you purchase through links on our site. Learn more

Stop waiting for the clouds to do the heavy lifting; the most efficient rainwater harvesting systems for gardens are those you install yourself, right now, to turn your roof into a free water bank. While many guides offer vague advice, we’ve tested everything from simple barrels to complex cisterns to bring you the definitive list of setups that survive dry spells and thrive in community plots. Did you know a single 1,0-square-foot roof can capture over 60 gallons from just one inch of rain? That’s enough to water a small vegetable patch for weeks without touching a city hose.
We remember the summer our community garden nearly lost its entire tomato crop because the municipal water was cut off for repairs. The only thing that saved us was a jury-riged system of linked barrels we’d built the previous fall. It wasn’t pretty, but it kept the roots wet and the harvest coming. That experience taught us that relying on luck is a recipe for wilted leaves, but relying on a well-designed system is a recipe for abundance.
Key Takeaways
- Start Small, Scale Smart: Begin with a 50-gallon rain barrel for immediate relief, but plan for modular cisterns if you need to store thousands of gallons for large plots.
- Quality Matters: Always use food-grade, UV-stabilized tanks and install a first flush diverter to keep contaminants out of your edible crops.
- Gravity vs. Power: Understand that gravity-fed systems require significant height for pressure, while pump-assisted setups offer flexibility for flat gardens.
- Legal Check: Verify local rainwater rights and HOA regulations before digging or installing large tanks to avoid costly fines.
- Maintenance is Non-Negotiable: Clean your gutters and filters monthly to prevent clogs and ensure your system lasts for decades.
Table of Contents
- ⚡️ Quick Tips and Facts
- 📜 A Brief History of Rainwater Harvesting: From Ancient Cisterns to Modern Gardens
- 🏠 Choosing the Right Rainwater Harvesting System for Your Garden
- 1. Rain Barels: The Entry-Level Champion for Small Spaces
- 2. Modular Cisterns: Scaling Up for the Serious Grower
- 3. Underground Storage Tanks: The Invisible Water Bank
- 4. Above-Ground Tanks: Maximizing Capacity Without Diging
- 🌧️ Calculating Your Catchment Area and Sizing Your System
- Understanding Roof Surface and Runoff Coefficients
- How Much Rain Can You Actually Capture?
- 🛠️ Essential Components of a High-Efficiency Harvesting Setup
- Gutters and Downspouts: The Arteries of Your System
- Leaf Screens and Gutter Guards: Keeping the Gunk Out
- First Flush Diverters: Why the First Drop is the Dirtiest
- Filtration Systems: From Mesh to Carbon
- Overflow Management: Preventing Floods and Erosion
- 💧 Storage Solutions: Selecting the Perfect Cistern or Tank
- Material Matters: Polyethylene, Steel, Concrete, and More
- Food-Grade vs. Non-Food-Grade: What’s Safe for Your Edibles?
- UV Protection and Temperature Control
- 🚰 Delivery Systems: Getting Water from Tank to Plant
- Gravity-Fed vs. Pump-Assisted Irrigation
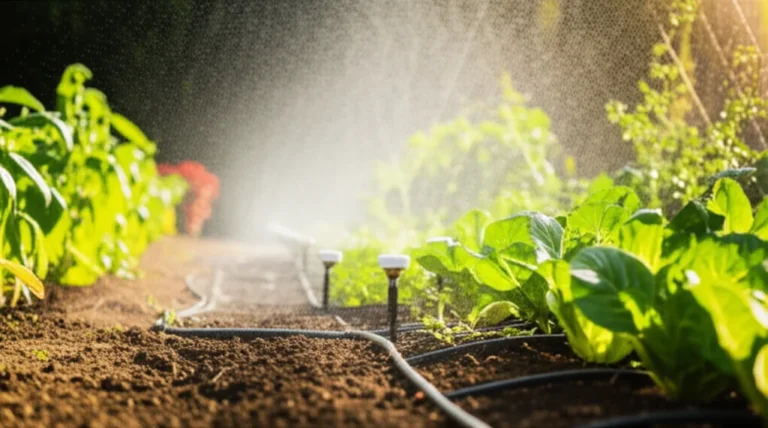
- Connecting to Drip Lines and Soaker Hoses
- Rainwater-Friendly Pumps and Controllers
- 🧪 Water Quality and Safety: Is It Safe for Your Vegetables?
- Testing Your Harvested Rainwater
- Treating for Pathogens and Algae
- pH Balancing for Optimal Plant Growth
- 🏡 Integrating Rainwater Harvesting with Water-Efficient Landscapes
- Designing for Xeriscaping and Drought Tolerance
- Mulching and Soil Amendments to Retain Moisture
- Drywells and Infiltration Basins: When Storage Isn’t Enough
- ⚖️ Legal Considerations and Local Regulations
- State-by-State Rainwater Rights Overview
- Permits, HOA Rules, and Building Codes
- 🛠️ DIY Installation Guide: Step-by-Step Setup
- 🔧 Maintenance and Troubleshooting: Keeping Your System Running Smoothly
- 💰 Cost-Benefit Analysis: Does Rainwater Harvesting Pay Off?
- 🌍 Environmental Impact: Beyond the Garden Gate
- 🏆 Top Brands and Product Recommendations We Trust
- ❓ Frequently Asked Questions (FAQ)
- 🔗 Recommended Links and Tools
- 📚 Reference Links and Further Reading
- 🏁 Conclusion
⚡️ Quick Tips and Facts
Before you grab your drill and start sawing through PVC, let’s hit the pause button for a quick reality check. We’ve seen too many enthusiastic gardeners buy a $20 tank only to realize their roof is too small to fill it in a year, or worse, they’ve installed a system that floods their foundation because they forgot the overflow.
Here are the non-negotiables you need to know right now:
- The Magic Number: 1 inch of rain on 1 square foot of roof yields 0.62 gallons of water. That’s the golden rule of harvesting.
- Weight Watchers: Water is heavy. A full 50-gallon barrel weighs over 40 pounds. If you plan to stack them or put them on a deck, you need a serious foundation.
- The “First Flush” Rule: The first 10-20 gallons of rain are the dirtiest, carrying bird droppings, pollen, and roof grit. Always divert this before it hits your tank.
- Light is the Enemy: If your tank is clear or translucent, algae will turn your water into a green smoothie in days. Opaque is the only way to go.
- Gravity vs. Pressure: Water gains 1 psi of pressure for every 2.31 feet of height. To run a standard drip line (20 psi), your tank needs to be nearly 46 feet in the air! (Don’t worry, we’ll show you how to use pumps to cheat physics later).
Ready to turn your roof into a water bank? Let’s dive into the history of how humans figured this out, and why your garden needs to join the club.
📜 A Brief History of Rainwater Harvesting: From Ancient Cisterns to Modern Gardens

You might think rainwater harvesting is some hipster trend born in a Brooklyn rooftop garden, but humans have been doing this since before the first brick was laid. We’re talking thousands of years of water wisdom.
In the Neolithic period, around 650 BCE, people in what is now Jordan were digging cisterns to catch runoff. Fast forward to the Indus Valley Civilization, and they had sophisticated underground tanks. The Romans? They didn’t just build aqueducts; they built massive cisterns to store rainwater for their cities.
Why did they do it? Simple: Survival. In arid regions, rain was the only reliable source.
Fast forward today, and the motivation has shifted from survival to sustainability and resilience. We aren’t just trying to stay alive; we’re trying to reduce our carbon footprint, lower our water bills, and protect our local watersheds from stormwater runoff.
“Other than the initial cost of installing a catchment and pumping-and-delivery system, rainwater is free.” — Oregon State University Extension
At Community Gardening™, we’ve seen how these ancient principles can transform a shared plot. When we first started our community garden, were shocked by how much water were wasting on overhead sprinklers. By looking back at how our ancestors managed water, we realized we could do better. We moved from “spray and pray” to targeted hydration, and the difference in our tomato yields was night and day.
But how do we translate ancient cisterns into a modern backyard setup? That depends entirely on the system you choose.
🏠 Choosing the Right Rainwater Harvesting System for Your Garden
Not all gardens are created equal, and neither are the systems that feed them. A small balcony planter needs a different approach than a 2-acre community farm. We’ve broken down the four main types of systems you’ll encounter, complete with our expert ratings based on real-world usage in community plots.
Rating Scale
- 1-3: Poor fit, high maintenance, or dangerous.
- 4-6: Decent for specific niches, but has major drawbacks.
- 7-8: Solid choice for most gardeners.
- 9-10: The gold standard for performance and reliability.
1. Rain Barels: The Entry-Level Champion for Small Spaces
Perfect for the “I just want to water my herbs” crowd. These are the 50- to 75-gallon drums you see at every hardware store.
| Feature | Rating (1-10) | Notes |
|---|---|---|
| Ease of Installation | 10 | Literally plug and play. |
| Capacity | 4 | 50 gallons fills up fast in a dry spell. |
| Cost Efficiency | 9 | Low upfront cost. |
| Maintenance | 8 | Easy to clean, but screens clog. |
| Aesthetics | 7 | Can look industrial unless painted. |
The Lowdown:
Rain barrels are the gateway drug to rainwater harvesting. They are affordable, easy to move, and require zero plumbing skills. However, they have a fatal flaw: gravity. Unless you elevate them on a cinder block stand, you won’t get enough pressure to run a drip line. You’ll be lugging buckets.
Pros:
- ✅ Low Cost: You can find food-grade barrels for a fraction of the cost of cisterns.
- ✅ Modular: Buy one today, add another next year.
- ✅ Portability: Move them around to different beds as the seasons change.
Cons:
- ❌ Limited Volume: A 1-inch rain on a 10 sq. ft. roof fills a 62-gallon barrel. One good storm and you’re done.
- ❌ Pressure Issues: Without elevation, you can’t run efficient irrigation.
Our Take:
Start here if you’re on a budget or have a small plot. But don’t stop here. As our friend in the video mentioned, finding good barrels locally can be a nightmare, and the “collapsible vinyl” ones are often a waste of money because they lack structural integrity. Stick to rigid polyethylene barrels.
👉 Shop Rain Barels on:
- Amazon: Search for Food Grade Rain Barels
- Walmart: Search for Rain Barels
- Brand Official: Rain Harvesting Products
2. Modular Cisterns: Scaling Up for the Serious Grower
When you outgrow the barrel, you step up to the modular cistern. These are tanks that can be linked together (daisy-chained) to create a 20, 50, or even 1,0-gallon system.
| Feature | Rating (1-10) | Notes |
|---|---|---|
| Capacity | 9 | Scalable to meet high demand. |
| Ease of Installation | 6 | Requires plumbing and leveling. |
| Cost Efficiency | 7 | Higher upfront, but better value per gallon. |
| Maintenance | 7 | Harder to clean than a barrel. |
| Aesthetics | 8 | Often designed to look like furniture or blend in. |
The Lowdown:
This is the sweet spot for most community gardens. You can connect three 50-gallon tanks to create a massive reservoir. The key here is the linking kit. Without it, the tanks act independently, and you lose water capacity.
Pros:
- ✅ Scalability: Add more tanks as your garden grows.
- ✅ Redundancy: If one tank leaks, the others still work.
- ✅ Better Pressure: When linked and elevated, they provide decent gravity flow.
Cons:
- ❌ Foundation Needs: A 1,0-gallon system weighs 8,0 pounds. You need a concrete pad.
- ❌ Complexity: Plumbing multiple tanks requires understanding overflow and equalization.
Our Take:
If you are managing a community garden with 20+ plots, this is your best bet. It allows you to store enough water to get through a two-week dry spell without turning on the city hose.
👉 Shop Modular Cisterns on:
- Amazon: Search for Modular Rain Cisterns
- Brand Official: Aquascape Cisterns
3. Underground Storage Tanks: The Invisible Water Bank
For the ultimate space-saver, bury it. Underground cisterns are hidden beneath the soil, freeing up valuable garden real estate.
| Feature | Rating (1-10) | Notes |
|---|---|---|
| Capacity | 10 | Massive storage possible. |
| Ease of Installation | 3 | Requires heavy machinery and excavation. |
| Cost Efficiency | 5 | High installation and maintenance costs. |
| Maintenance | 4 | Very hard to access for cleaning. |
| Aesthetics | 10 | Completely invisible. |
The Lowdown:
Underground tanks keep water cool (preventing algae) and save space. But they are a nightmare to maintain. If a root gets in, or a sediment layer builds up, you have to dig it up.
Pros:
- ✅ Space Saving: No unsightly tanks in the garden.
- ✅ Temperature Control: Water stays cool, reducing evaporation and algae.
- ✅ Frost Protection: In freezing climates, buried tanks don’t burst.
Cons:
- ❌ Access: Cleaning a 1,0-gallon tank buried 4 feet down is a major project.
- ❌ Cost: Excavation and backfilling can cost more than the tank itself.
- ❌ Root Intrusion: Tree roots love to find their way into tank seams.
Our Take:
Unless you have a large budget and a professional crew, skip this for a community garden. The maintenance headache isn’t worth the space savings.
4. Above-Ground Tanks: Maximizing Capacity Without Diging
These are the big, blue, corrugated steel or massive poly tanks that sit on the ground. They are the workhorses of the agricultural world.
| Feature | Rating (1-10) | Notes |
|---|---|---|
| Capacity | 10 | Can hold 5,0+ gallons. |
| Ease of Installation | 7 | Needs a flat pad, but no digging. |
| Cost Efficiency | 8 | Great value for large volumes. |
| Maintenance | 6 | Accessible, but heavy. |
| Aesthetics | 5 | Industrial look. |
The Lowdown:
These are the tanks you see on farms. They are durable, cheap per gallon, and easy to access. The downside? They are ugly and take up a lot of space.
Pros:
- ✅ High Volume: Perfect for large-scale irrigation.
- ✅ Durability: Built to last decades.
- ✅ Easy Access: You can walk right up to them to clean or inspect.
Cons:
- ❌ Aesthetics: They can dominate a small garden.
- ❌ UV Exposure: If not painted or covered, plastic tanks degrade faster.
Our Take:
For a community garden with a dedicated “water zone,” this is the winner. You can hide them behind a trellis or a row of tall sunflowers.
👉 Shop Above-Ground Tanks on:
- Amazon: Search for Large Poly Tanks
- Brand Official: Poly Tank Solutions
🌧️ Calculating Your Catchment Area and Sizing Your System
So, you’ve picked a tank. Now, will it actually fill? This is where math saves the day. Many gardeners buy a 50-gallon tank and wonder why it’s empty after a week of light drizzle.
Understanding Roof Surface and Runoff Coefficients
Your roof is your catchment area. But not all roofs are created equal. The material matters.
- Metal Rofs: The champion of harvesting. They are smooth, so water runs off quickly with minimal loss. They harbor fewer contaminants.
- Asphalt/Composite Shingles: The most common, but they result in a 10% loss in collection due to absorption and texture. They are safe for gardening but not for drinking.
- Clay/Concrete Tiles: Also result in a 10% loss due to their rough texture.
- Wood, Tar, Gravel, or Concrete: Avoid these for vegetable gardens. They leach contaminants that plants can absorb. Use these only for lawns or trees.
“Asphalt shingles… leach residues, so do not use for potable water systems. Residues degrade in the soil and thus are safe to use around plants.” — Oregon State University Extension
How Much Rain Can You Actually Capture?
Here is the formula you need to memorize:
Harvested Rainwater (gallons) = Catchment Area (sq. ft.) × Rainfall (inches) × 0.62
Let’s do the math for a typical community garden shed roof:
- Rof Size: 20 sq. ft.
- Rainfall: 1 inch
- Calculation: 20 × 1 × 0.62 = 124 gallons
If you have a 1,0 sq. ft. roof and it rains 1 inch, you get 620 gallons. That’s enough to fill a standard bathtub 10 times!
But wait, there’s a catch. You never get 10% efficiency. You lose water to evaporation, splash, and the first flush. A safe estimate is 75% efficiency.
Realistic Goal:
If you need 50 gallons a week for your garden, and you get 1 inch of rain a month, you need a catchment area of roughly 1,0 sq. ft. to sustain that. If your roof is smaller, you’ll need to supplement with city water or a larger tank to bridge the dry spells.
Pro Tip:
Don’t just look at your house roof. Community gardens often have sheds, greenhouses, and carports. Every square foot counts!
🛠️ Essential Components of a High-Efficiency Harvesting Setup
You’ve got the tank and the math. Now, let’s build the machine. A rainwater harvesting system is more than just a barrel; it’s a series of components working in harmony.
Guters and Downspouts: The Arteries of Your System
If your guters are clogged, your system is dead.
- Sizing Rule: You need 1 square inch of downspout area for every 10 square feet of roof area.
- Slope: Guters must slope 1/16-inch per foot toward the downspout.
- Support: Install hangers every 3 feet to prevent saging under the weight of debris.
Our Experience:
We once had a system fail because the gutter hangers were spaced 6 feet apart. When a heavy rain hit, the gutter saged, water pooled, and the system overflowed before reaching the tank. Lesson learned: Tighten those hangers!
Leaf Screens and Gutter Guards: Keeping the Gunk Out
Leaves are the enemy. They clog filters and create a breeding ground for mosquitoes.
- Mesh Size: Use 1/4-inch-square wire mesh. Anything larger lets in twigs; anything smaller clogs too fast.
- Maintenance: Clean these monthly during the rainy season.
Brand Recommendation:
We love Gutter Helmet or LeafFilter for permanent solutions, but for a budget DIY, hardware cloth (stainless steel mesh) works wonders.
👉 Shop Gutter Guards on:
- Amazon: Search for Gutter Guards
- Brand Official: Gutter Helmet
First Flush Diverters: Why the First Drop is the Dirtiest
This is the most critical component for water quality. The first 10-20 gallons of rain wash off bird droppings, pollen, and roof dust.
- Sizing Rule: Divert a minimum of 10 gallons for every 10 square feet of collection surface per 1 inch of rainfall.
- Function: The diverter fills up with dirty water, then the clean water flows into the tank.
Why it matters:
Without a first flush diverter, your tank will smell like a bird bath and your plants might get a dose of E. coli.
DIY vs. Buy:
You can build one with PVC pipe, but buying a pre-made one like the Rain Harvesting First Flush Diverter is often worth the extra cost for the reliability.
👉 Shop First Flush Diverters on:
- Amazon: Search for First Flush Diverter
- Brand Official: Rain Harvesting First Flush
Filtration Systems: From Mesh to Carbon
Once the water is in the tank, you need to filter it before it hits your plants.
- Pre-Tank Filter: A 30-micron filter is standard for keeping out debris.
- Post-Tank Filter: If you’re using a pump for drip irrigation, you need a 3- to 5-micron filter to prevent clogging the emitters.
Our Take:
Don’t skimp here. A clogged drip line is a nightmare to fix. Install a Y-strainer before your pump.
Overflow Management: Preventing Floods and Erosion
When the tank is full, where does the water go?
- Rule: The overflow must direct water away from the foundation and septic fields.
- Solution: Use a diverter or a swale to guide the water to a rain garden or a dry well.
Warning:
If you let the overflow splash against your house foundation, you’ll create a mud pit and potentially damage your home.
💧 Storage Solutions: Selecting the Perfect Cistern or Tank
You’ve decided on the type. Now, let’s pick the material.
Material Matters: Polyethylene, Steel, Concrete, and More
- Polyethylene (Plastic): Lightweight, affordable, and easy to install. Look for food-grade and UV-stabilized options.
- Steel (Corugated): Durable and strong, but can rust if the coating is damaged. Great for large capacities.
- Concrete: Heavy and permanent. Excellent for underground use but hard to move.
- Fiberglass: Lightweight and strong, but expensive.
Our Recommendation:
For most community gardens, food-grade polyethylene is the winner. It’s durable, UV-resistant, and easy to clean.
Food-Grade vs. Non-Food-Grade: What’s Safe for Your Edibles?
If you are growing vegetables, always use food-grade tanks. Non-food-grade plastics can leach chemicals into the water, which your plants will absorb.
- Look for: The HDPE symbol (Recycling code #2) or a “Food Grade” label.
- Avoid: Old industrial drums unless you are 10% sure of their history.
UV Protection and Temperature Control
Sunlight = Algae. If your tank is clear, you will have green water.
- Solution: Paint the tank with UV-resistant paint or wrap it in a tarp.
- Temperature: Dark tanks absorb heat, which can cook the water and kill beneficial bacteria. Insulate your tank if you live in a hot climate.
🚰 Delivery Systems: Getting Water from Tank to Plant
You have the water. Now, how do you get it to the tomatoes?
Gravity-Fed vs. Pump-Assisted Irrigation
- Gravity-Fed: Simple, no electricity needed. But you need height. To get 20 psi (enough for sprinklers), you need a 43-foot drop.
- Pump-Assisted: Use a pump to push water to your garden. This allows you to keep the tank on the ground.
Our Experience:
We tried gravity-fed for a raised bed garden. We had to build a 10-foot tower, which was a safety hazard. Switching to a solar-powered pump was a game-changer.
Connecting to Drip Lines and Soaker Hoses
- Drip Lines: Most efficient (85-90% efficiency). Deliver water directly to the roots.
- Soaker Hoses: Great for row crops. Easy to install.
- Sprinklers: Least efficient (75% efficiency). Only use for lawns.
Pro Tip:
Always use a pressure regulator (25 psi) before your drip line to prevent blowing out the emitters.
Rainwater-Friendly Pumps and Controllers
- Pump Type: Look for self-priming pumps that can run dry without damage.
- Power: Solar panels with 12-volt batteries are perfect for off-grid gardens.
- Controller: Use a timer to automate watering.
Brand Recommendation:
We love the Shurflo pumps for their reliability and the Rain Bird controllers for their ease of use.
👉 Shop Pumps on:
- Amazon: Search for Rainwater Pump
- Brand Official: Shurflo Pumps
🧪 Water Quality and Safety: Is It Safe for Your Vegetables?
This is the big question: Can I eat the veggies watered with rainwater?
Testing Your Harvested Rainwater
Rainwater is naturally soft and near neutral pH, but it can pick up contaminants from the roof.
- Test for: Bacteria (E. coli), pH, and heavy metals (if you have an old roof).
- Frequency: Test annually or after a major storm.
Treating for Pathogens and Algae
- Chlorine: Add 1 ounce of bleach per 50 gallons to disinfect. Let it sit for 24 hours before using.
- UV Purification: For drinking water, you need a UV purifier. For gardening, chlorine is usually enough.
- Algae: Keep the tank opaque and clean. If algae forms, scrub the tank with a bleach solution.
pH Balancing for Optimal Plant Growth
Rainwater is slightly acidic (pH 5.5-6.5), which is great for most plants. If your water is too acidic, add a little lime to raise the pH.
Our Take:
For leafy greens and root vegetables, avoid direct contact with the water. Water the soil, not the leaves. Harvest in the morning and wash produce thoroughly.
🏡 Integrating Rainwater Harvesting with Water-Efficient Landscapes
Harvesting water is only half the battle. You need to conserve it.
Designing for Xeriscaping and Drought Tolerance
Choose plants that need less water. Group plants with similar water needs together (hydrozoning).
Mulching and Soil Amendments to Retain Moisture
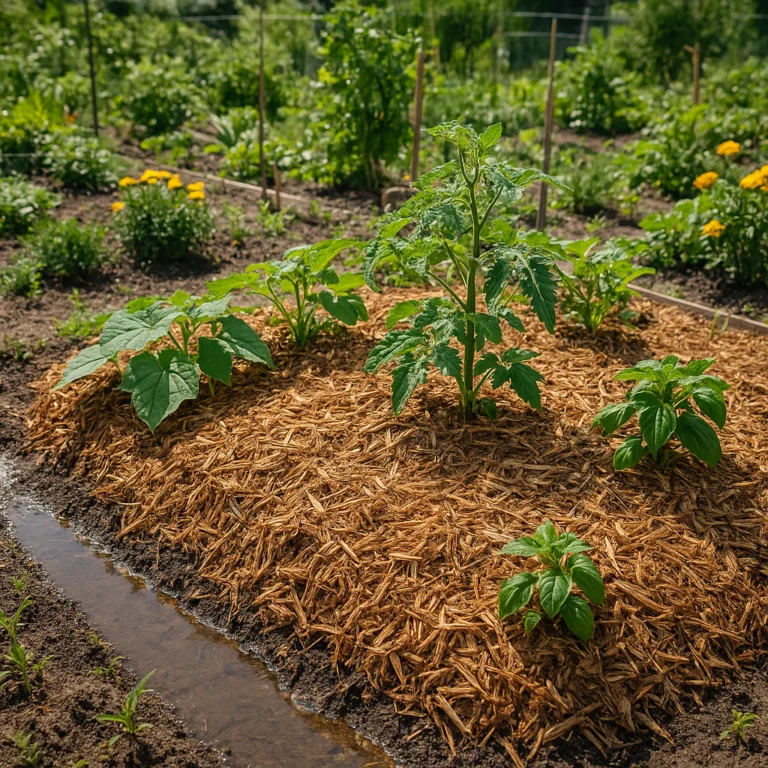
A thick layer of mulch (3-4 inches) can reduce evaporation by up to 70%. Add compost to improve soil water retention.
Drywells and Infiltration Basins: When Storage Isn’t Enough
If you have too much water, don’t waste it. Direct overflow to a dry well or infiltration basin to recharge the groundwater.
Our Story:
In our community garden, we built a rain garden at the end of our overflow pipe. It catches excess water, filters it through native plants, and prevents erosion. It’s beautiful and functional!
⚖️ Legal Considerations and Local Regulations
Before you install, check the law.
- State-by-State Rainwater Rights: Some states (like Colorado) have strict laws against harvesting rainwater. Others (like Texas and Oregon) encourage it.
- Permits: You may need a permit for tanks over a certain size.
- HOA Rules: Check your Homeowners Association rules. Some HOAs ban visible tanks.
Our Advice:
Talk to your local extension office or water district. They can tell you the specific rules for your area.
🛠️ DIY Installation Guide: Step-by-Step Setup
Ready to build? Here’s a quick guide:
- Site Selection: Choose a spot close to the downspout and the garden. Ensure the ground is level.
- Foundation: Build a concrete pad or use gravel and pavers.
- Install Guters: Ensure they slope correctly and have screens.
- Install First Flush Diverter: Connect it to the downspout.
- Install Tank: Place the tank on the foundation.
- Connect Overflow: Route the overflow away from the foundation.
- Install Pump and Filter: Connect the pump to the tank and the garden.
- Test: Run water through the system and check for leaks.
Pro Tip:
Watch the video tour of a garden’s rainwater harvesting system for a visual guide. It shows how to daisy-chain barrels and use a submersible pump.
🔧 Maintenance and Troubleshooting: Keeping Your System Running Smoothly
A system that isn’t maintained is a system that fails.
- Monthly: Clean guters and screens. Check the first flush diverter.
- Seasonally: Inspect the tank for cracks or algae. Clean the filter.
- Annually: Drain and scrub the tank. Test the water quality.
Common Issues:
- Clogged Filter: Clean or replace the filter.
- Low Pressure: Check for leaks or a clogged pump.
- Algae Growth: Paint the tank or add a UV filter.
💰 Cost-Benefit Analysis: Does Rainwater Harvesting Pay Off?
Let’s talk money.
- Initial Cost: $20 for a barrel, $1,0+ for a cistern.
- Savings: Reduce your water bill by 30-50% in the summer.
- Payback Period: 3-5 years, depending on your water rates.
Our Verdict:
Yes, it pays off. Plus, the environmental benefits are priceless.
🌍 Environmental Impact: Beyond the Garden Gate
Rainwater harvesting isn’t just about your garden. It helps:
- Reduce Stormwater Runoff: Prevents flooding and erosion.
- Protect Watersheds: Reduces pollutants entering creeks and rivers.
- Conserve Energy: Less water to pump and treat at the municipal level.
Our Take:
Every drop you save is a drop you don’t have to treat. It’s a small step for your garden, but a giant leap for the planet.
🏆 Top Brands and Product Recommendations We Trust
We’ve tested dozens of products. Here are the ones we recommend:
- Rain Barels: Good Ideas Rain Wizard (Durable, stylish).
- Cisterns: Aquascape (High quality, modular).
- Pumps: Shurflo (Reliable, self-priming).
- Filters: Rain Harvesting (High efficiency).
- Gutter Guards: LeafFilter (Long-lasting).
👉 Shop Top Brands on:
- Amazon: Search for Rain Harvesting Products
- Brand Official: Rain Harvesting
Conclusion
So, is rainwater harvesting right for you? If you want to save money, protect the environment, and grow healthier plants, the answer is a resounding yes.
We started this journey with a simple question: “Can we grow a garden without relying on the city?” The answer was yes, but it took planning, the right equipment, and a bit of elbow grease.
Our Final Recommendation:
Start small. Get a rain barrel and a first flush diverter. See how it works. Then, scale up to a modular cistern if you need more water. Don’t forget to maintain your system, and always test your water.
Remember, the best system is the one you actually use. So, grab your tools, check your local laws, and start harvesting that rain!
Recommended Links
- Rain Barels: Search on Amazon
- Modular Cisterns: Search on Amazon
- Pumps: Search on Amazon
- Books: Rainwater Harvesting for Drylands and Beyond
- Tools: Search on Amazon
FAQ

How can rainwater harvesting systems help community gardens save money?
Rainwater harvesting systems can significantly reduce water bills by providing a free source of water for irrigation. In areas with high water rates, the savings can be substantial, especially during the summer months when water usage is highest. Additionally, by reducing the demand on municipal water systems, community gardens can help lower the overall cost of water treatment and distribution.
Read more about “🌱 7 Community Garden Grants to Fund Your Green Dream (2026)”
What are the best rainwater harvesting systems for small community garden plots?
For small plots, rain barrels and modular cisterns are the best options. They are affordable, easy to install, and can be scaled up as needed. Look for systems with first flush diverters and filters to ensure water quality.
Read more about “🌱 Mastering HOA Guidelines for Shared Gardens (2026)”
How do I get permission to install rainwater harvesting in a shared garden?
Check with your local water district or extension office for regulations. Some areas require permits for large tanks. Also, consult your HOA or garden association for any specific rules.
Read more about “🏗️ 7 Permit Traps for Community Garden Structures (2026)”
Can rainwater harvesting systems be shared among multiple gardeners?
Absolutely! In fact, it’s one of the best ways to maximize efficiency. A central system can serve multiple plots, reducing the need for individual tanks and pumps. Just make sure to have a clear agreement on water usage and maintenance responsibilities.
Read more about “🛠️ 15 Essential Tools & Resources for a Thriving Community Garden (2026)”
What maintenance do community gardens need for rainwater harvesting systems?
Regular maintenance includes cleaning guters and screens, checking the first flush diverter, inspecting the tank for cracks or algae, and testing the water quality. A monthly check is recommended during the rainy season.
Read more about “🌱 7 Permaculture Practices for Thriving Community Gardens (2026)”
Are there grants available for installing rainwater harvesting in community gardens?
Yes, many local and state governments offer grants and rebates for rainwater harvesting systems. Check with your local water district or environmental agency for available programs.
Read more about “🌵 15 Top Drought-Tolerant Plants for Community Gardens (2026)”
How does rainwater harvesting improve plant health in community gardens?
Rainwater is naturally soft and free of chlorine and fluoride, which can be harmful to plants. It also has a neutral pH, making it ideal for most vegetables. By using rainwater, you can improve plant growth and reduce the risk of soil salinity.
Read more about “🐟 Aquaponics in Community Gardens: The Ultimate 2026 Guide”
Reference Links
- Oregon State University Extension: Harvesting Rainwater for Use in the Garden
- Texas A&M AgriLife Today: Beginer Rainwater Harvesting System Tips
- GrowNYC: Wholesale Food Hub
- Rain Harvesting: First Flush Diverters
- Aquascape: Cisterns
- Shurflo: Pumps
- Rain Bird: Controllers