Support our educational content for free when you purchase through links on our site. Learn more

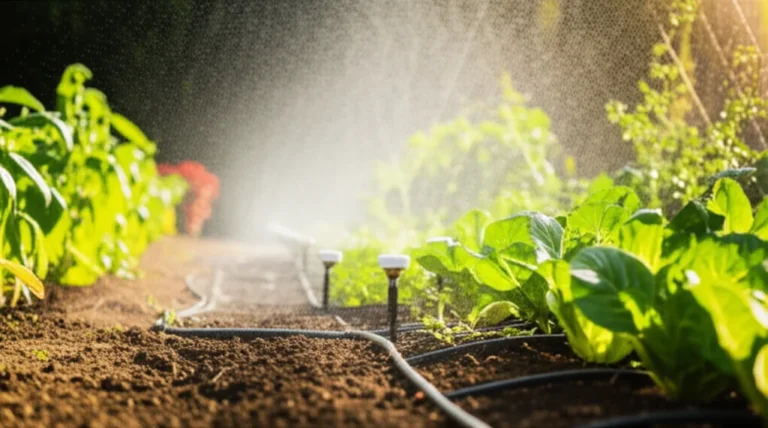
The secret to a thriving, low-maintenance community garden isn’t more water; it’s precision, and a properly installed drip irrigation system is the only way to achieve it. By automating hydration directly at the root zone, you can slash water usage by up to 50% while freeing volunteers from the endless chore of dragging heavy hoses.
Drip irrigation installation for community gardens transforms chaotic watering schedules into a seamless, efficient rhythm that keeps every plot—from the sun-baked tomatoes to the shade-loving herbs—perfectly hydrated. Imagine a Saturday morning where instead of fighting over a single spigot, your team is harvesting fresh produce while the system quietly does the work.
We’ve seen gardens turn from dusty patches of despair into lush oases simply by swapping overhead sprinklers for a well-planned drip network. In Senegal, a community called Santhie used a gravity-fed drip system to survive a nine-month drought, proving that the right setup can literally save lives.
Key Takeaways
- Water Efficiency: Drip systems deliver moisture directly to roots, reducing evaporation and saving up to 50% more water than traditional sprinklers.
- Zoning is Critical: Group plants by water needs and use pressure-compensating emitters to ensure uniform distribution across large, shared plots.
- Maintenance Matters: Regular filter cleaning and system flushing prevent clogs and extend the life of your investment.
- Community Impact: Automation reduces labor burdens, allowing volunteers to focus on education, social connection, and harvest.
Table of Contents
- ⚡️ Quick Tips and Facts
- 📜 From Mud Puddles to Masterpieces: A Brief History of Drip Irrigation in Community Spaces
- 🛠️ The Ultimate Community Garden Drip Irrigation Installation Guide: Step-by-Step Mastery
- 1. 📏 Site Assessment and Water Source Mapping
- 2. 🧮 Calculating Flow Rates and Pressure Requirements for Large Plots
- 3. 🧱 Selecting the Right Components: Emitters, Driplines, and Filters
- 4. 🔧 Asembling the Mainline and Sub-Main Network
- 5. 💧 Installing Drip Lines and Micro-Sprayers for Varied Plant Beds
- 6. ⏱️ Setting Up Smart Timers and Rain Sensors for Automation
- 7. 🧪 Flushing, Testing, and Troubleshooting Your New System
- 🧩 Zoning Strategies: Designing Efficient Layouts for Raised Beds, Rows, and Containers
- 🌱 Water Conservation Techniques: Maximizing Efficiency in Shared Garden Plots
- 🔍 Common Installation Mistakes and How to Avoid Them
- 🛒 Top-Rated Drip Irrigation Kits and Components for Community Projects
- 📖 Maintenance Calendar: Keeping Your System Running Smoothly Year-Round
- 💡 Budgeting for Success: Cost-Effective Solutions for Non-Profit Gardens
- 🤝 Collaborative Installation Days: Organizing Volunteers and Workshops
- 🌦️ Seasonal Adjustments: Winterizing and Spring Start-Up Protocols
- 🎓 Conclusion
- 🔗 Recommended Links
- ❓ FAQ
- 📚 Reference Links
⚡️ Quick Tips and Facts
Before we grab our shovels and roll out the tubing, let’s hit the ground running with some non-negotiable truths about drip irrigation in a shared space. We’ve seen too many well-meaning gardeners install a system only to find half the plot drowning while the other half is dust. Here is the lowdown from the trenches:
- Water Efficiency is King: Drip irrigation can save up to 50% more water compared to traditional overhead sprinklers by delivering moisture directly to the root zone, minimizing evaporation and runoff USDA Natural Resources Conservation Service.
- Pressure Matters: Unlike a sprinkler that needs a blast, drip systems thrive on low pressure (typically 10–30 PSI). If your water pressure is too high, you will blow out emitters. A pressure regulator is not optional; it’s your system’s best friend.
- Filtration is Your Shield: One speck of sand can clog an emitter. If you are using a well or a pond, a 120-mesh filter is the bare minimum. City water usually has less debris, but a filter is still smart insurance.
- The “Zoning” Rule: Never mix high-flow emitters (like 2 GPH) with low-flow ones (like 0.5 GPH) on the same line. You’ll end up with a dry patch and a swamp. Group plants by water needs.
- Sun Protection: UV rays are the silent killer of poly tubing. If you leave it exposed, it will turn brittle and crack within a season. Bury it or use UV-stabilized black tubing.
Curious about how a small community in Senegal turned a 9-month drought into a year-round harvest using nothing but gravity and grit? We’ll reveal their secret strategy later in the “Zoning Strategies” section, but spoiler alert: it involves thinking outside the box (and the water pipe).
📜 From Mud Puddles to Masterpieces: A Brief History of Drip Irrigation in Community Spaces

You might think drip irrigation is a modern invention born in a Silicon Valley lab, but the concept is as old as agriculture itself. Ancient civilizations in Egypt and China used clay pots with tiny holes buried near plant roots to sep water slowly. Fast forward to the 19th century, and we see the first patent for a porous clay pipe system in Germany.
However, the modern drip revolution began in Israel during the 1960s. Facing severe water scarcity, engineer Simcha Blass invented the first practical drip emitter that could regulate flow regardless of pressure fluctuations. This technology transformed arid landscapes into lush oases.
In the context of community gardening, the history is a bit more grassroots. For decades, community plots relied on the “Saturday Morning Hose Brigade”—a chaotic assembly of volunteers dragging heavy hoses, arguing over who got water first, and leaving half the garden dry.
“Drip systems are a common method of irrigating vegetable crops,” notes the Kansas State University publication Drip Irrigation for Community Gardens (MF3124), highlighting that the shift from manual watering to automated systems is a game-changer for volunteer retention Kansas State University.
The narrative shifted when communities realized that labor reduction was just as important as water savings. In the Santhie community in Senegal, the introduction of a gravity-fed drip system in 2020 didn’t just save water; it liberated women from the back-breaking task of hauling water cans twice a day. As Coura Diouf, a local mother, put it, “My children like the vegetables we grow… it is very sweet.” This story, documented by CREATE!, proves that appropriate technology can drive social empowerment, not just agricultural yield CREATE! Action.
Today, we are seeing a blend of high-tech smart timers and low-tech gravity systems, all united by a single goal: sustainable, shared abundance.
🛠️ The Ultimate Community Garden Drip Irrigation Installation Guide: Step-by-Step Mastery
Ready to turn your plot from a watering chore into a self-sustaining oasis? Grab your tape measure and let’s get to work. This isn’t just about hooking up a hose; it’s about engineering a system that respects the soil, the plants, and the volunteers.
1. 📏 Site Assessment and Water Source Mapping
Before you buy a single foot of tubing, you need to know your battlefield.
- Measure Everything: Map out every raised bed, row, and container. Note the distance from your water source (spigot, rain barrel, or hydrant) to the furthest plant.
- Identify the Water Source: Is it city water (consistent pressure) or a rain barrel (variable, gravity-fed)? This dictates your component choices.
- Sun Exposure: Mark areas with full sun (high evaporation) vs. shade. You might need different emitter rates for these zones.
Pro Tip: Walk the garden at different times of the day. You might find a hidden low spot where water pools, or a high spot that stays bone dry. These micro-climates dictate your zoning.
2. 🧮 Calculating Flow Rates and Pressure Requirements for Large Plots
This is where many DIYers stumble. A community garden isn’t a single tomato plant; it’s a network.
- Determine Total GPH (Gallons Per Hour): Add up the flow rate of every emitter you plan to install.
Example: 10 plants x 1 GPH emitter = 10 GPH total demand. - Check Your Source: Can your spigot or pump deliver 10 GPH? If your source only delivers 50 GPH, you must split the system into zones so they don’t run simultaneously.
- Pressure Drop: As water travels through long lines, pressure drops. If your garden is 20 feet long, you might lose significant pressure by the end. You may need a larger diameter mainline (1-inch instead of 3/4-inch) to maintain flow.
3. 🧱 Selecting the Right Components: Emitters, Driplines, and Filters
Choosing the right gear is like picking the right seeds—get it wrong, and nothing grows.
| Component | Types | Best For | Pros | Cons |
|---|---|---|---|---|
| Dripline | Inline (emitters pre-installed) | Rows of crops (carots, lettuce) | Easy installation, uniform spacing | Hard to adjust if plants move |
| Drip Tubing | 1/2″ Poly Tubing + Stake Emitters | Raised beds, mixed plantings | Flexible, customizable emitter placement | More time-consuming to install |
| Micro-Sprayers | Adjustable spray heads | Ground cover, dense foliage | Covers larger area, cols plants | Higher evaporation, less efficient |
| Filters | Disc vs. Screen | All systems | Prevents clogging | Requires regular cleaning |
| Pressure Regulator | 15, 25, 30 PSI | High-pressure sources | Protects emitters from bursting | Adds a point of failure if low quality |
- Emitters: For vegetables, pressure-compensating (PC) emitters are a must. They deliver the same amount of water whether the plant is at the start or end of the line. Brands like Netafim and Rain Bird offer excellent PC options.
- Tubing: Use UV-stabilized polyethylene tubing for mainlines. For the final run to plants, 1/4″ micro-tubing is great for flexibility.
👉 Shop Drip Components on:
- Rain Bird: Amazon Search | Official Site
- Netafim: Amazon Search | Official Site
- Orbit: Amazon Search | Official Site
4. 🔧 Asembling the Mainline and Sub-Main Network
Think of this as the circulatory system of your garden.
- Connect to Source: Attach a backflow preventer (crucial for community gardens to protect public water) to your spigot.
- Install Filter & Regulator: Connect the filter first, then the pressure regulator.
- Run the Mainline: Lay 3/4″ or 1″ tubing along the perimeter of the garden. Use staples or stakes to secure it, but don’t crush the tubing.
- Create Sub-Mains: Branch off the mainline to different zones (e.g., “Raised Beds,” “Row Crops,” “Fruit Trees”). Use barbed tes and couplers to connect.
Watch Out: If you hear a hising sound, you have a leak. Stop immediately. A small leak in a community system can waste thousands of gallons a season.
5. 💧 Installing Drip Lines and Micro-Sprayers for Varied Plant Beds
Now for the fun part: feeding the plants.
- Raised Beds: Run 1/2″ tubing in a serpentine pattern across the bed. Insert stake emitters next to each plant. For leafy greens, use a drip line with emitters spaced every 6-12 inches.
- Row Crops: Lay a single line of inline drip tape down the center of the row. This is cost-effective for large plantings of beans or corn.
- Containers: Use a drip stake for each pot. For hanging baskets, a micro-sprayer on a flexible stem works wonders.
Remember: Always leave a little slack in the tubing. Plants grow, and you might need to move a pot or adjust a bed later.
6. ⏱️ Setting Up Smart Timers and Rain Sensors for Automation
The “set it and forget it” dream.
- Timers: For community gardens, a battery-operated dual-zone timer is often best. It allows you to water the thirsty tomatoes in the morning and the shade-loving herbs in the evening.
- Rain Sensors: Essential for shared spaces. A rain sensor (like the Orbit B-hyve or Rain Bird models) will skip watering if it rains, preventing waterlogging and saving money.
- Smart Controllers: If you have a budget, consider Wi-Fi enabled timers (like Rachio or B-hyve) that adjust watering based on local weather data.
Why automate? In the Santhie project, automation (via gravity and simple timers) meant women could focus on education and community building instead of hauling water. It’s about time equity.
7. 🧪 Flushing, Testing, and Troubleshooting Your New System
You’ve built it. Now, make sure it works.
- Flush the System: Before attaching emitters, open the end caps and run water for 2-3 minutes to flush out debris from the manufacturing process.
- Pressure Test: Turn on the system. Walk the lines. Look for leaks, check that emitters are dripping (not spraying), and ensure pressure is consistent.
- Adjust Flow: If an emitter is too fast or slow, use the adjustment screw (if available) or replace it.
- Plug Mistakes: If you drilled a hole in the wrong spot, use a gof plug. It’s a small, cheap piece of plastic that saves a lot of embarrassment.
Did you know? The first YouTube video on this topic emphasizes that measuring correctly is 90% of the battle. “You’re going to want to make sure you measure correctly and plan how you’re going to water your plants,” the creator advises. Watch the video here.
🧩 Zoning Strategies: Designing Efficient Layouts for Raised Beds, Rows, and Containers
One size does not fit all. A community garden is a mosaic of different needs.
- The “Hydro-Zone” Concept: Group plants with similar water needs together.
Zone A (High Water): Tomatoes, peppers, squash.
Zone B (Medium Water): Beans, lettuce, herbs.
Zone C (Low Water): Succulents, drought-tolerant natives. - Raised Beds: These dry out faster. Use drip tape or closely spaced emitters.
- In-Ground Rows: These retain moisture longer. Space emitters further apart or use sub-surface drip to reduce evaporation.
- Containers: These are the most volatile. They need frequent, short watering cycles. A multi-outlet manifold is perfect here.
The Santhie Lesson: In Senegal, they used a gravity-fed system that relied on elevation. By placing a water tank on a raised platform, they created pressure without electricity. This is a brilliant strategy for off-grid community gardens or those with unreliable power.
🌱 Water Conservation Techniques: Maximizing Efficiency in Shared Garden Plots
Water is precious. Here’s how to make every drop count.
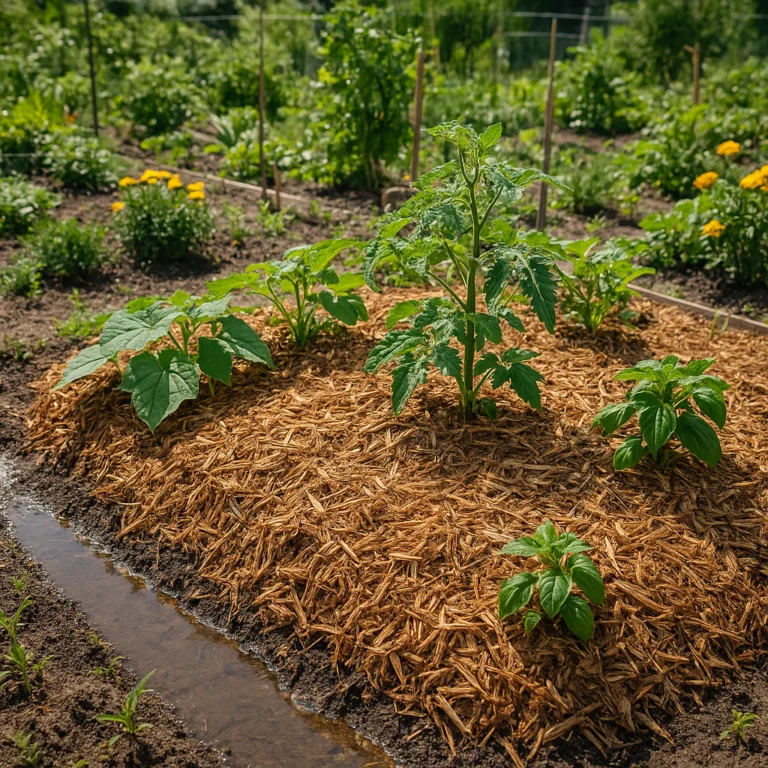
- Mulch is Magic: Always cover your soil with 2-3 inches of straw, wood chips, or compost. This reduces evaporation by up to 70%.
- Soil Health: Healthy soil with high organic matter acts like a sponge, holding water longer. Add compost annually.
- Night Watering: Water between 4 AM and 6 AM. Evaporation is lowest, and plants absorb water before the heat of the day.
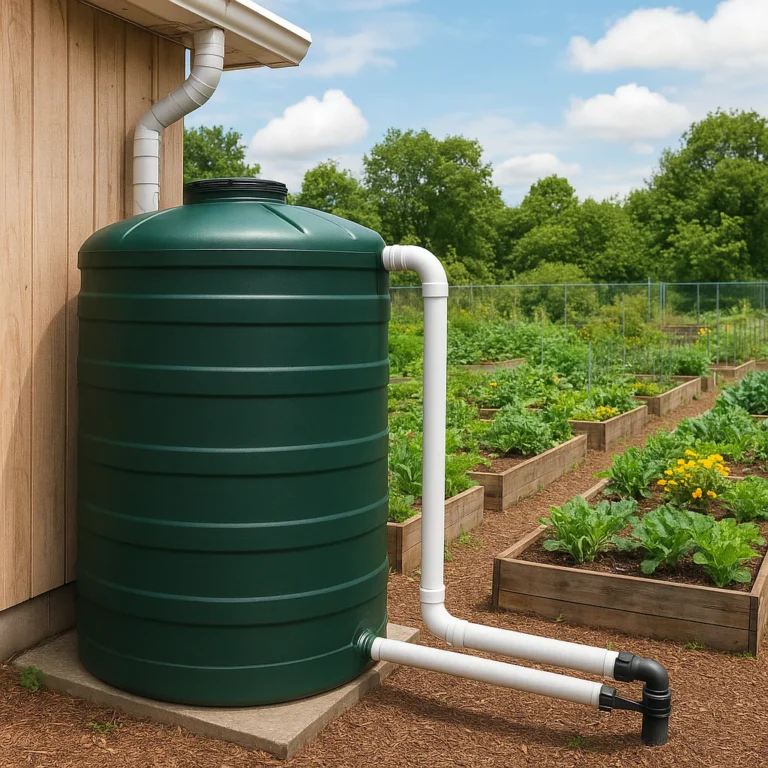
- Rainwater Harvesting: Connect your system to rain barrels. It’s free water that’s perfect for drip systems (just add a filter).
Fun Fact: According to the EPA, outdoor water use can account for up to 50% of household water consumption in summer. Community gardens that optimize irrigation set a powerful example for the neighborhood.
🔍 Common Installation Mistakes and How to Avoid Them
We’ve all been there. Here are the pitfalls to dodge:
- ❌ No Filter: Leading to clogged emitters.
Fix: Install a 120-mesh filter immediately. - ❌ Mixing Flow Rates: Putting 1 GPH and 2 GPH emitters on the same line.
Fix: Create separate zones for different flow rates. - ❌ Exposed Tubing: Leaving 1/2″ tubing in direct sun.
Fix: Bury it or use UV-resistant black tubing. - ❌ Ignoring Pressure: Not using a regulator.
Fix: Install a pressure regulator (15-30 PSI) at the source. - ❌ Poor Planning: Not measuring the garden first.
Fix: Sketch a map and calculate GPH before buying.
🛒 Top-Rated Drip Irrigation Kits and Components for Community Projects
Choosing the right kit can save hours of frustration. Here are our top picks based on durability, ease of use, and community feedback.
Rating Table: Top Drip Irrigation Kits for Community Gardens
| Product Name | Design (1-10) | Functionality (1-10) | Durability (1-10) | Ease of Install (1-10) | Best For |
|---|---|---|---|---|---|
| Orbit B-hyve Smart Kit | 9 | 10 | 8 | 9 | Tech-savy groups, automation |
| Rain Bird Drip Irrigation Kit | 8 | 9 | 9 | 8 | Large plots, reliability |
| Netafim DIY Drip Kit | 9 | 10 | 10 | 7 | High-efficiency, professional grade |
| Gardena Micro-Drip System | 8 | 8 | 9 | 9 | Raised beds, small plots |
| Dripworks Custom Kit | 10 | 10 | 10 | 6 | Custom large-scale projects |
Detailed Analysis
Orbit B-hyve Smart Kit
- Design: Slek, modern, and app-controlled.
- Functionality: Uses weather data to auto-adjust watering.
- Pros: Incredible water savings, easy to manage remotely.
- Cons: Requires Wi-Fi and a subscription for some features.
- Verdict: Perfect for tech-forward community gardens.
Rain Bird Drip Irrigation Kit
- Design: Classic, robust, and straightforward.
- Functionality: Reliable pressure regulation and filtration.
- Pros: Durable components, widely available parts.
- Cons: Less “smart” features, manual timer required.
- Verdict: The workhorse for traditional community plots.
Netafim DIY Drip Kit
- Design: Professional grade, high-quality emitters.
- Functionality: Superior pressure compensation.
- Pros: Longest lifespan, most efficient water use.
- Cons: Higher upfront cost, slightly steeper learning curve.
- Verdict: Best for serious growers wanting a 10-year system.
👉 Shop Kits on:
- Orbit: Amazon Search | Official Site
- Rain Bird: Amazon Search | Official Site
- Netafim: Amazon Search | Official Site
📖 Maintenance Calendar: Keeping Your System Running Smoothly Year-Round
A system is only as good as its maintenance. Here’s your seasonal checklist:
- Spring (Start-Up):
- Flush the system.
- Check for winter damage (cracks, leaks).
- Clean filters.
- Adjust timers for longer days.
- Summer (Peak Season):
- Inspect emitters monthly for clogs.
- Check for leaks after heavy rains.
- Adjust watering times based on heat waves.
- Fall (Wind-Down):
- Reduce watering frequency.
- Clean filters thoroughly.
- Drain the system if freezing is expected.
- Winter (Dormancy):
Winterize: Blow out lines with compressed air or drain completely. - Store timers indoors.
- Cover exposed tubing.
Did you know? A single clogged emitter can cause a plant to die in days. Regular checks are non-negotiable.
💡 Budgeting for Success: Cost-Effective Solutions for Non-Profit Gardens
Community gardens often run on shoestring budgets. Here’s how to stretch your dollar:
- DIY vs. Pre-made: Buying individual components (tubing, emitters, fittings) is often 30-50% cheaper than pre-made kits, though it takes more time.
- Grants and Donations: Look for local water utility rebates. Many utilities offer free or discounted drip kits to encourage conservation.
- Volunteer Power: A “Build Day” can save hundreds in labor costs. Provide snacks and tools, and the community will do the work.
- Scrap and Reuse: Can you reuse old tubing from last year? (Only if it’s not brittle). Can you repurpose rain barrels?
The Santhie Model: They funded their system through produce sales and a VSLA (Voluntary Savings & Lending Association). This community-led financing model is a powerful tool for any garden looking to be self-sufficient.
🤝 Collaborative Installation Days: Organizing Volunteers and Workshops
Installing a system is a perfect community event.
- Plan the Day: Break the project into stations (cuting tubing, installing emitters, connecting mainlines).
- Train the Team: Have a “lead installer” who knows the system. Teach the basics to volunteers.
- Celebrate: End with a potluck. A shared meal cements the sense of ownership.
- Document: Take photos and videos. This is great for grant applications and future fundraising.
Why it works: When people build it, they care for it. The “Not In My Backyard” syndrome disappears when it’s “Our Backyard.”
🌦️ Seasonal Adjustments: Winterizing and Spring Start-Up Protocols
Don’t let the frost kill your hard work.
- Winterizing:
Drain: Open all end caps and let water drain out.
Blow Out: If you have a compressor, blow air through the lines to remove residual water.
Disconnect: Remove timers and filters. Store them in a dry place. - Spring Start-Up:
Inspect: Check for rodent damage or UV cracks.
Flush: Run water to clear debris.
Reconnect: Install filters and timers.
Test: Run the system zone by zone.
Pro Tip: In cold climates, bury the mainline below the frost line to prevent freezing.
🎓 Conclusion

We’ve journeyed from the ancient clay pots of Egypt to the high-tech smart timers of today, and even to the gravity-fed miracles of Senegal. The path to a thriving community garden is paved with planning, patience, and the right tools.
Drip irrigation isn’t just about saving water; it’s about empowering your community. It frees up time for education, social connection, and the simple joy of watching things grow. Whether you choose a high-tech smart system or a simple gravity-fed setup, the key is to start small, measure carefully, and involve everyone.
Remember the question we asked at the beginning: How did a small community in Senegal turn a 9-month drought into a year-round harvest? The answer lies in community initiative. They didn’t wait for a savior; they pooled their resources, hired a technician, and built a system that worked for them. You can do the same.
So, grab your tape measure, rally your neighbors, and let’s get watering. Your garden is waiting.
🔗 Recommended Links
👉 Shop Drip Irrigation Systems:
- Orbit Smart Drip Kits: Amazon | Official Site
- Rain Bird Professional Kits: Amazon | Official Site
- Netafim DIY Systems: Amazon | Official Site
Books & Guides:
- Drip Irrigation for Community Gardens (MF3124): Kansas State University Bookstore
- The Complete Guide to Drip Irrigation: Amazon Search
Inspiration:
- Taking Initiative: Santhie Installs a Drip Irrigation System: CREATE! Action
❓ FAQ

What are the best drip irrigation kits for community garden plots?
The best kit depends on your garden’s size and technical needs. For large, diverse plots, the Rain Bird Drip Irrigation Kit offers robust durability and reliability. For tech-savy groups wanting automation, the Orbit B-hyve Smart Kit is unbeatable. If you need maximum efficiency and have a higher budget, Netafim components are the gold standard. Always consider your water source pressure and the specific needs of your plant zones.
Read more about “🌱 Mastering HOA Guidelines for Shared Gardens (2026)”
How do I design a drip irrigation system for a shared community garden?
Design starts with zoning. Group plants by water needs (high, medium, low) and create separate lines for each. Map out your garden, measure distances, and calculate the total Gallons Per Hour (GPH) required. Ensure your water source can handle the load. Use a pressure regulator and filter at the source. Finally, plan for accessibility so volunteers can easily reach emitters for maintenance.
Read more about “🌧️ 7 Rainwater Harvesting Systems for Gardens That Actually Work (2026)”
Can community gardeners share a single water source for drip irrigation?
Yes, absolutely. In fact, it’s common. However, you must calculate the total flow rate of all zones combined. If the demand exceeds the source’s capacity, you must install a multi-zone timer to water different sections at different times. A backflow preventer is mandatory to protect the public water supply from contamination.
Read more about “🌱 7 Community Garden Grants to Fund Your Green Dream (2026)”
What is the cost of installing a drip irrigation system in a community garden?
Costs vary widely based on size and components. A basic DIY system for a small plot can cost $10-$30, while a large, automated system with smart timers and professional-grade components can run $1,0+. However, many water utilities offer rebates for installing water-efficient systems, which can significantly offset costs.
Read more about “🌵 15 Top Drought-Tolerant Plants for Community Gardens (2026)”
How often should community gardens check their drip irrigation emitters?
Check emitters monthly during the growing season. Look for clogs, leaks, or broken lines. In high-sediment areas, check filters bi-weekly. A quick visual inspection while watering is the best way to catch issues early.
Are there grants available for community garden irrigation installation?
Yes. Many local water districts, state agricultural departments, and non-profits offer grants or rebates for water conservation projects. Organizations like CREATE! have also funded community irrigation projects in developing regions. Check with your local extension office or water utility for specific programs.
How do you winterize a drip irrigation system in a community garden?
To winterize, drain all water from the lines by opening end caps. If you live in a freezing climate, use a compressor to blow out residual water. Remove timers and filters, clean them, and store them indoors. Cover any exposed tubing to prevent UV damage and cracking.
Read more about “🌱 5 Smart Irrigation Systems for Community Gardens (2026)”
📚 Reference Links
- Kansas State University: Drip Irrigation for Community Gardens (MF3124) – KSRE Bookstore
- CREATE! Action: Taking Initiative: Santhie Installs a Drip Irrigation System – CREATE! Blog
- USDA Natural Resources Conservation Service: Water Conservation in Agriculture – NRCS
- EPA: WaterSense: Outdoor Water Use – EPA WaterSense
- Rain Bird: Drip Irrigation Design Guide – Rain Bird
- Orbit: Drip Irrigation Installation Guide – Orbit
- Netafim: Drip Irrigation Solutions – Netafim